

Safety Controller QCA
group nameController
-
Min Order1 piece
brand nameDADISICK
modelController QCA
-
update timeThu, 09 May 2024 20:45:01 GMT
Paramtents
Mains Input: AC100V~230V±15% 50/60 Hz : DC24V±10%
Overall Power Consumption: ≤5W
Input Voltage: WC220V or WC110V
Output Voltage: DC12V or DC24V
Output Current: ≤200mA
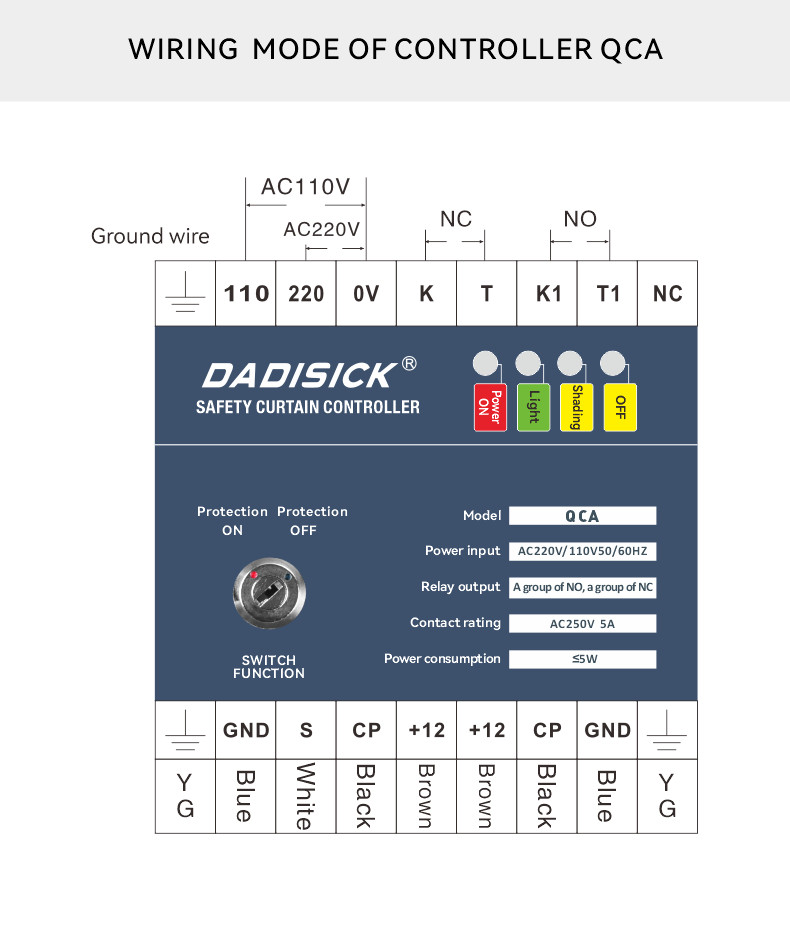
Output: One normally open, one normally closed (standard
Response Time: <20ms
Certificate: ISO, CE, UL ,FCC, TUV
Packging & Delivery
Min Order1 piece
Briefing
Controller QCA for Dadisick Safety Light Curtains
Detailed
|
Safety controller product model
|
|||
|
Controler
|
QCA
|
||
Certificate | ISO, CE, UL, FCC, TUV | ||
|
Features
|
|||||||
|
Mains input
|
AC 100 V~230 V ± 15% 50/60 Hz; DC 24 V ± 10%
|
||||||
Overall power consumption | ≤5 W | ||||||
|
Input voltage
|
WC 220 V or WC 110 V
|
||||||
|
Output voltage
|
DC 12 V or DC 24 V
|
||||||
|
Output current
|
≤200 mA
|
||||||
Output form | One normally open, one normally closed (standard configuration) | ||||||
Output contact capacity | 5 A,AC 250 V / DC 30 V (Resistive load) | ||||||
Response time | <20 ms | ||||||
Lifetime of relay | ≥1 million times (Electrical Life) | ||||||
|
Mechanical data
|
|||
|
Case material
|
Plastics
|
||
|
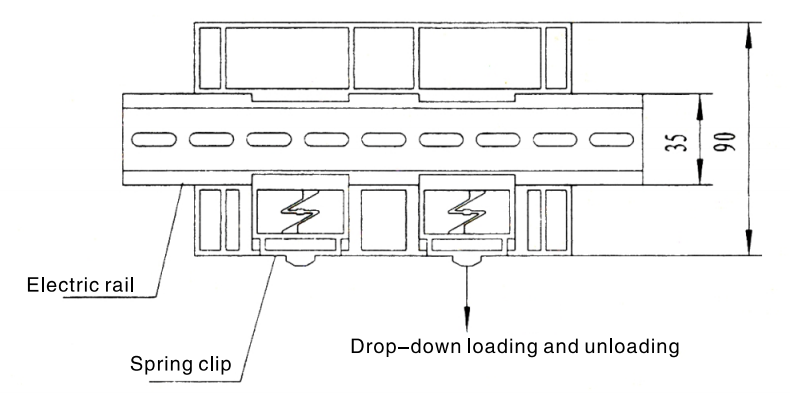
Install
|
Installation of guide rail slot
|
||
|
Mode of connection
|
Connect the plug
|
||
|
Maximum wire size
|
0.5m²
|
||
|
Environmental characteristics
|
|||
|
Work environment temperature
|
-10°C ~ 55°C
|
||
|
Storage temperature
|
-40℃ ~ 70℃
|
||
|
Work ambient humidity
|
35%RH ~ 85%RH
|
||
|
Storage ambient humidity
|
35%RH ~ 95%RH
|
||
|
Level of protection
|
IP20
|
||
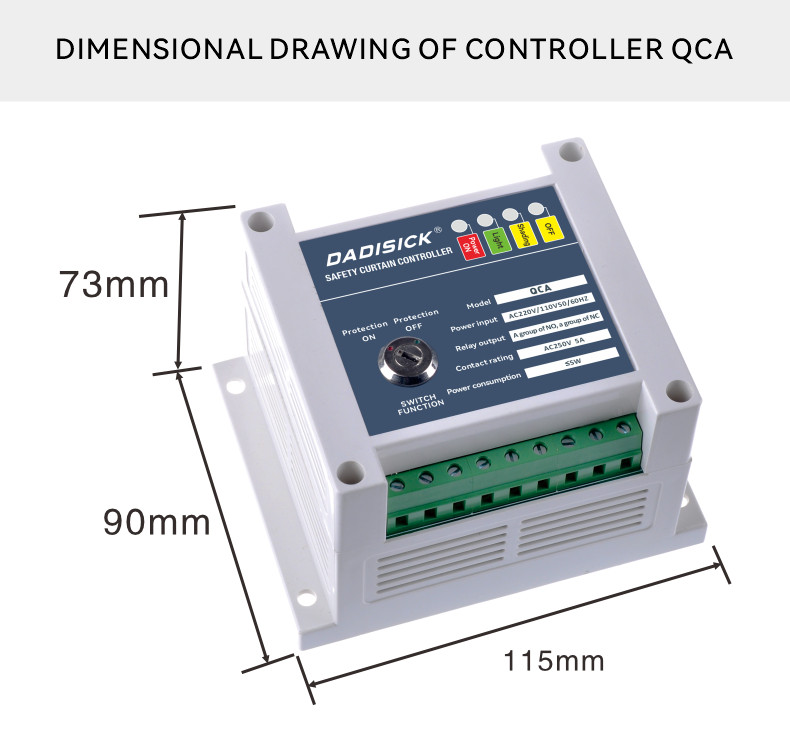
Boundary dimension | 115 × 90 × 73 mm | ||
You need a product


You May Like


- Delivery clauses under the trade mode
- CIP